September 2018 Week #4
Hola people!
This week was obviously something else, we managed a ton of progress like the last week!


This time, I got something I could use. I still had to move around the surfaces in the U.V. layout though, which was something that I had underestimated to be a piece of cake. Turns out, when you scale, rotate or move vertices or edges in the U.V. map, the other surfaces adjust to that and change as well, something that we don't want. Fixing that took some serious refining of math, repetitive unwrappings and deletions of unnecessary, really small, almost invisible, surfaces on the layout... but I did it.


Originally made on 510x510p, the image had to be enlarged to 4096x4096p for the U.V. layout (that's right, I've got some solid 4K textured models coming up over here), so the test image doesn't look that detailed. But still, it definitely looks better on the mesh. Eh voila!:

Now I have a tried-and-tested texturing environment to work in for my characters, that enables me to create as much as 5 textures per hour. Pretty cool! Also, I made a few more animations and improved the existing ones by making them more believable and removing some nasty mesh deformations, but this blog post is already running too long so perhaps it's a good idea that I don't list the new animations. What you need to know is that we have more than enough quality animations for the final game, and we can always make more.
This week was obviously something else, we managed a ton of progress like the last week!

ADITYA CHANDRA (Lead Developer)
Last week I was busy animating the humanoid characters. This week, I started U.V. mapping the character so that I could texture him. The character was U.V. mapped in Blender, where it was made, rigged and animated (...and painfully experimented upon). It was not easy: first I attempted unwrapping the mesh to get a U.V. map without marking the seams, "It's just a cube-y little guy. What could possibly go wrong?" But when the unwrapping was done, what I got on the U.V. layout was something that looked like a potato. Learning from that mistake, I went on, carefully marked the seams, ignoring all the unnecessary vertices, and then unwrapped. This time, it wasn't a potato... it was a mashed, rotten potato. Frustrated, I then just selected all the vertices and clicked on 'Unwrap'.
This time, I got something I could use. I still had to move around the surfaces in the U.V. layout though, which was something that I had underestimated to be a piece of cake. Turns out, when you scale, rotate or move vertices or edges in the U.V. map, the other surfaces adjust to that and change as well, something that we don't want. Fixing that took some serious refining of math, repetitive unwrappings and deletions of unnecessary, really small, almost invisible, surfaces on the layout... but I did it.

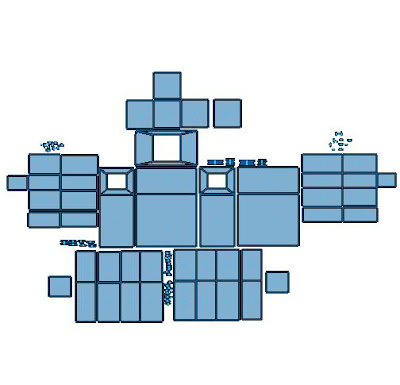
Now I had a really friendly environment for texturing the character. But before that, I had to test this U.V. layout and see if it is configured correctly (that's right... a face for a hand will be just too nasty for me to see). So I opened up my favourite image editor, Autodesk SketchBook!
In there I drew the first ever texture for our dear humanoid character...

But when I saw what it looked like on the mesh, I noticed that his hands were... kinda upside down. Also, notice those nasty black lines in the screenshot above. Those were generated in the U.V. layout, and needed to be removed. Instead of just editing the stuff, I decided to redo everything, and made a brighter, more vibrant image.


Now I have a tried-and-tested texturing environment to work in for my characters, that enables me to create as much as 5 textures per hour. Pretty cool! Also, I made a few more animations and improved the existing ones by making them more believable and removing some nasty mesh deformations, but this blog post is already running too long so perhaps it's a good idea that I don't list the new animations. What you need to know is that we have more than enough quality animations for the final game, and we can always make more.
DIWANGSHU KAKOTY (3D Artist)
Exams. No major progress. Sorry.
That was pretty much it for this week, guys. A big thank you to all of you for dropping by. Next week, we'll look into creating as many textures as we can with our new friendly texturing environment, and then making some awesome new digital 3D models! Be sure to read next week's blog post as well, and thank you once again!
Comments
Post a Comment